
![]()

![]()


Table of Contents
Description
utymap is a library which provides highly customizable API for procedural world generation using real vector map data, e.g. OpenStreetMap, NaturalEarth. Core logic is written on C++11 and can be used on many platforms as it has no dependency to specific game engine or application framework. It is designed for interactive world creation at different zoom levels, including globe and street level.
Status
Current master branch has a very experimental version. It is recommended to use the latest release.
Build
See instructions here.
Structure
Source code
Project consists of four sub-projects:
- android contains Android Studio project to build core library for Android platform.
- core contains essential logic written on C++11 for constructing of map based apps: mesh generators, mapcss parser, spatial geo index, etc. It does not depend on any 3D render framework or game engine.
- docs contains documentation files.
- unity contains examples written on C# which can be reused to build map oriented Unity3D apps using core library. It demonstrates basic use cases: globe zoom level rendering, 3D scene with all details.
Documentation
Best way to start with the project is reading documentation files in docs folder which cover the following topics:
- Build instructions
- Understanding data model
- Understanding mapcss
- Terrain generator
- Using textures
- Tree generation via L System
- How to..
Demo scenes
The simplest way to explore the project is to check source code of demo scenes:
- Import scene shows how to import map data from a file. Please note, that import and rendering logic depends on mapcss rules which means you cannot use arbitrary mapcss with arbitrary data format.
- Elevation scene shows how elevation support works. Please note, as scene loads multiple tiles at once, mapzen server might reject some of requests. Also, first time loading takes time: just wait a little bit and restart the scene again. Once processed, all downloaded data is cached inside StreamingAssets/index folder.
- Customization scene demonstrates three aspects of customization:
- How to use custom logic for building game objects from existing map data
- How to use custom prefabs to replace arbitrary elements on the map
- How to add new elements to map data and scene
- Search scene demonstrates offline search API in action which can be used for exploring nearby objects by their specific characteristics (bus stops, bars, etc.)
- Third Person contains default third person character from standard assets which can walk around rendered environment. Another interesting part here is how text search can be used to get nearest address from OSM data.
- Map scene is the most advanced one. It is designed to be a full functional map component which can be used in mobile builds. It supports zoom levels from globe overview till street view.
Features
Mobile support
Performance is constantly in main focus. As result, utymap can be used on mobile phone: just check demo app in play store. Of course, there are still areas for improvements.
Various map data
utymap can use various vector map data sources and file formats:
- Mapzen (geojson)
- OpenStreetMap (pbf, xml)
- NaturalEarth (shape data)
Theoretically, you can extend utymap with any vector map data format support.
Multiple zoom levels
utymap can load your scene at different zoom levels:
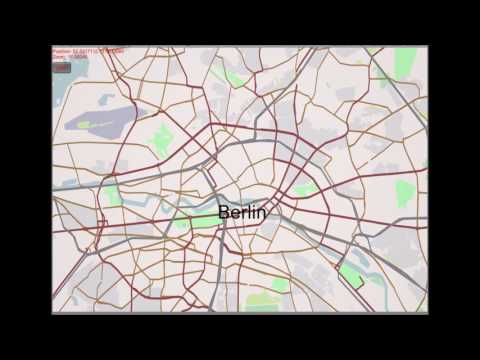
In this demo, mapzen data is used for zoom levels from 1 till 15 and OpenStreetMap for zoom level 16.
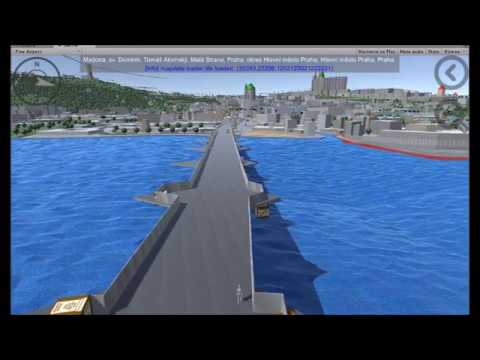
Non flat terrain
utymap encapsulates elevation processing internally to support different elevation data providers:
- raw SRTM
- mapzen elevation data
- your own elevation data by conversion in simple text format
This old demo is built using elevation data provided by mapzen:
Custom styles
utymap supports styling via CSS-like language:
area|z16[building],
area|z16[building:part] {
    builder: building;
    height: 12m;
    min-height: 0m;
    facade-color: gradient(#c0c0c0, #a9a9a9 50%, #808080);
    ...
}
area|z16[roof:shape=skillion] {
    roof-type: skillion;
}
area|z16[building:color] {
    roof-color: eval("tag('building:color')");
}
area|z16[building:material=brick] {
    facade-color: gradient(#0fff96, #0cc775 50%, #066139);
    facade-texture-type: brick;
}
For example, you can have different styles for different seasons of year. Or you can vary textures based on region

Tree generation
utymap can consume map data to generate more complex tries via custom L-System implementation

Flexible extension
If you want to build or use your own models, extend application logic (for example, by attaching MonoBehaviour to generated meshes), you can do it using custom scripts in Unity:
public GameObject Build(Tile tile, Element element)
{
    GameObject gameObject = GameObject.CreatePrimitive(PrimitiveType.Cube);
    gameObject.name = GetName(element);

    var transform = gameObject.transform;
    transform.position = tile.Projection.Project(element.Geometry[0],
        GetMinHeight(element) + element.Heights[0]);
    transform.localScale = new Vector3(2, 2, 2);

    gameObject.GetComponent<MeshFilter>().mesh.uv = GetUV(element);
    gameObject.GetComponent<MeshRenderer>().sharedMaterial = GetMaterial(element);

    return gameObject;
}
Map data is encapsulated via Element class which provides access to raw geometry and attributes.
Map editor
You can build your own objects (buildings, roads, etc.) on top of generated objects:
IMapDataEditor editor = _compositionRoot.GetService<IMapDataEditor>();
var node = new Element(7,
    new GeoCoordinate[] { new GeoCoordinate(52.53182, 13.38762) },
    new double[] { 0 },
    new Dictionary<string, string>() { { "name", "Near me" } },
    new Dictionary<string, string>());

editor.Add(MapStorageType.InMemory, node, new Range<int>(minLevelOfDetail, maxLevelOfDetail));
This data can be stored in multiple data storages located on disk or memory to keep original map data untouched.
Contacts
Do not hesitate to contact me using gitter chat link above.